CPQ Sepctrum Software Design: Configure, Price ,Quote

CPQ is a sales optimization App works in tandem with CRM platforms, ERP programs, and other business technology, which helps user to ensure integrated data as well as accuracy.

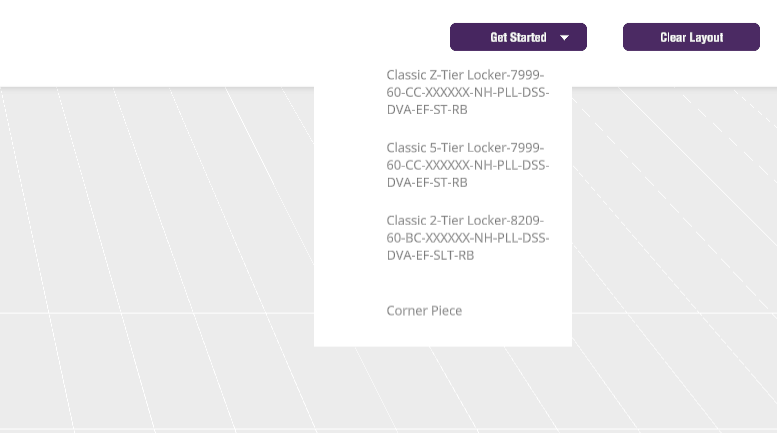
Our Client Spectrum’s goal is to allow their customers to build high-end phenolic lockers, design 3D lock room, and generate quotes for orders quickly and accurately.


Role: Product Designer (Team with 2 product managers, 3 unity developers and 3 spec team members)

Responsibilities: Product Thinking, Whiteboarding, Protottyping, Interaction Design, User Testing, Dev Support

Timeline: 8 months

Watts and Spectrum are our current 2 clients on CPQ

purplebanner.png

Background Information

Spectrum is part of ATS Brand product group consist of lockers, lab equipment, lockers and counter top and we promote this product with the architectural community. (This is the white label product design we firstly developed for our client Spectrum.

Problems and Goals

The approval and dimension drawings of a locker take a. lot of time,which is one of the target for CPQ .

Currently, self served tool for a rep are required for manufacturer to be provided to configure, quote and place an order by themselves to scale our business 10 times from a 5 million to a 50 million dollar business. 

pure-white-background-85a2a7fd.jpg
 

GOAL

The Goal is to help rep agencies to Configure, Quote, and place an order by themsleves quickly and accurately

 
pure-white-background-85a2a7fd.jpg

User Research & testing

Study Details

A combination of Quantitive and qualititive research & testing methods to acheive the goal

Qualitative research is applied in the begining of the development, to understand current user flow and pain points, getting feedback from each design iteration.

Quantitative research is to benchmark the user performance post launch, aiming to compare the user experience and engagement with the past and uncover the issues and improvement.


Methodolegy

User Interview

Heuristic Evaluation

User Analysis

Timeline

Phase 1: Layout Editor + Quickstart

Phase 2: Quotations

Phase 3: Purchasing 

Future Plans: Different Partitions/Products that Spectrum covers ie. Labs, Countertops


purplebanner.png

Research Notes:

 In the begining of the product development, I reviewed and analyzed our client’s (Spectrum) website to understnad current user flow and make comparison with the objective of CPQ. We also scheduled meetings with the other client Borbrick to understand their current order system.

  1. The issue of current worklfow is user can only configure one product at one time and add it to their cart which requires a lot of duplication of work and it’s time consuming.

  2. We want to allow user configure the product and save the configuration after that. So next time when they log into their account they can still see the configuration and being able to edit the products they configured, after finish editing, they can add it to their cart or save the new configuration product. Other than that, of course we will need to include the process of configuring the lock room in a 3D and 2D view.

  3. After understood business objecttives and user flow, I made a quick mockup to give the whole process a holistic view of structure.

  4. Our team provided a framework to the internal spec team (their responsibility is to help clients configure and quote the products) to get their feedback and decision support.

    In order to get the feedback that we are looking for, here’s what we focused on:

    • Ask specific questions

    • Provide a number list pf. questions

    • Provide guiding supplementaldocuments (scenarios, design principles and goals)

pure-white-background-85a2a7fd.jpg


 With the feedback from internal team, I was able to make design modifications properly and created a UX Guide to Product Management Team. There are 3 steps to creating a Shop Drawing: first each locker needs an associated shape, then the shop drawing camera takes screenshots of the locker shapes in 3 different angles, and lastly the PrintService sends all the information to the Shop Drawing Print call.

Getting Started

Login'/Sign up

Who can sign up?

Sharing 

  • Who is sharing layout with each other drawing?

Reps

  • Project list → can ATS see all projects created in the system including those by the REPS/Customers?

  • Login Tab

    • Log into CPQ Spectrum using the same credentials used to access SpecTool

  • Remember Me can be used to remember the user email between sessions.

  • Forgot password below the login button can be used to reset the user’s password


Dashboard

After logging in, the user will be taken to Spectrums main dashboard. From here you can create new projects, and configure new locker specifications to be used while building a room layout.

  • Projects

    • Allows users to browse available projects

    • An already created project can be edited from the project list by clicking on either the edit or delete icon under “Actions”.

    • A new project can be created by clicking on the “Create New Project” button on the top right of the project list.

    • Available projects can be filtered using the “enter your search” field.

    • Clicking on a project will show a list of layouts that are associated to the project

      • clicking on one of these layouts will direct you to the layout editor


Layouts

  • A layout is a collection of configured lockers (created during project creation), together with the ability to edit/place lockers in a 3D scene.

  • A new layout is created during the process of creating a project, as well as under the “Layouts” tab

  • Creating a new room layout requires having an already existing project, so you’ll have to first create a new project before adding a new layout to it.

  • Just as with projects, the Layout list can be used to view, edit, delete, or create new project layouts.

  • Clicking on a layout will bring you to the 3D edit view, where you can place your configured lockers into a scene.

  • Note - Editing layouts is currently WIP


Project Creation

  1. Creating a new project involves both creating the project, creating a new first layout, and selecting locker configurations to place in your first layout.

  2. You will first be prompted to fill in your basic project information.


3. Finally you will select your building occupancy information, and move on to configuring your first locker.


Locker Configuration

  • In order to place a locker in your layout, you must first configure a complete locker configuration.

 
  1. The first step is to choose a locker series:

2. Once you select a locker series, you will choose specific options/accessories for your configured locker


3. Next, you will be prompted to choose an available lock to place on your configured locker:

4. Finally, you will be asked to confirm your configured locker. You will be able to modify your configuration, choose the quantity of available lockers to place in the layout, or add new locker configurations or hardware to the layout. When you are happy with your configuration, press “Create Layout” to create your new project and begin editing your scene.


Room/Layout Edit Mode (3D and 2D)

Once you select a layout to edit, you will be brought to Spectrum’s 3D edit view:

Note: Saving a configuration is WIP

  • Product Selection and Placing Lockers into the Scene

    • On the left hand panel, you will be able to see a list of your configured lockers (under “My Products”) as well as an indicator of how many lockers have been placed into the scene.

    • To place your first locker or corner piece, click on the “Get Started” dropdown on the top left, and select a locker to place into the scene.

Navingating the 3D Scene

  • Use the right click button on your mouse to pan the camera around the scene.

  • Use the left click button on your most to move the camera direction, in order to get a better view of the scene.

  • The camera can be moved in 3D view using the WASD keys (W for forward, S for back, A for left, and D for right)

  • Press space bar in order to switch between 3D view and a top down 2D view. In the 2D view, the left mouse button can be used to position the camera.

  • Press T at any time to re-center your camera, in either 2D or 3D mode.


Placing Lockers into the Scene

  • In order to begin placing lockers into the scene, click the “Getting Started” dropdown and select a locker or corner piece from the list. Once selected, the first locker will be placed into the scene.

Once placed into the scene, you can freely use your camera to view your placed locker.

  • In order to place a new locker into the scene, it must be placed next to an already existing locker.

  • To add more lockers, click on an already existing one, and select the direction of the new locker to place. Then select the locker to place from the list which popups, and a new locker will appear in the scene.


Exporting as a Shop Drawing

  • Once you have finished layout out your scene, you can export your layout as a completed shop drawing.

  • To export as a shop drawing, click “Export” on the top navigation bar.

Spec draing sample


Examples:

Below are a few examples of room layouts you can make in CPQ Spectrum

A U-shape configuration using 2 corner pieces and several configured Spectrum Classic Lockers;

An L-Shape configuration using both Z and 5-tier Spectrum Classic Lockers:

A straight line configuration showing 2-Tier dark, Z-Tier, and 5-Tier Classic Spectrum Lockers

pure-white-background-85a2a7fd.jpg

 user testing

CPQ Spectrum User Testing Guide

This guide will be a walk through for users that will be taking part in the SPECTRUM CPQ application testing. The feedback for the application will be taken as a survey listed below. Please spend at least 30 minutes in the application or test until you think you have tested all parts of the application.

Areas to review

  • Project Creation

    • Creating a project

    • Filling in Basic Details

  • Product Configuration

    • Selecting various options that are available for a product

    • Configuring multiple different products

  • Locker Placements

    • Flexibility of placing different products

    • Ability to create different configurations with different products (ex. L shaped, U shaped)

  • Shop Drawing Generation

    • Time it took to generate a shop drawing (Currently it takes about a day to produce a shop drawing by hand)

    • Accurate representation of the layout that was built

    • Review of product information on the shop drawing

    • Note: Please remember to save your shop drawings and a screen capture of the configurations you built as you will need it to upload them in the survey

Mandatory user testing survey

A SPECTRUM CPQ survey should be taken after testing out the application. This survey will help the development team improve the application.

purplebanner.png

RESULTS & learnings

Currently we are still at the stage of collecting feedback from user testing as well as continued engagements with the clients.

This was my first design lead project in a full product life-cycle development from research, ideation, design, launch and iterations. I was able to apply multiple user reseach methods as well as present my UX deliverables tto internal teams, stakeholders, and clients. Working iteratively an agile environment was a great experience that led to a use-centric workflow with good design and development.